The shoot goes perfectly, the scenes are spotless, and your confidence level is high. But then, you sit down to listen to the recording, and there it is, that continuous, annoying hissing sound. At that moment, instead of editing it, you’re left with the question of how to get rid of hiss in the audio.
Don’t panic, though; audio cleanup is not such a difficult task when a professional handles it, so don’t think about going for another take. There are practical solutions to removing the hissing noise in the audio. Our experts at Media Medic will save you from spending a lot of time, effort, and money on another recording attempt. You can read our latest article on hidden listening devices for the car, by clicking here.
But to give you more insight, let’s describe what causes the hissing noise distorting your audio.
What is a Hiss Noise?
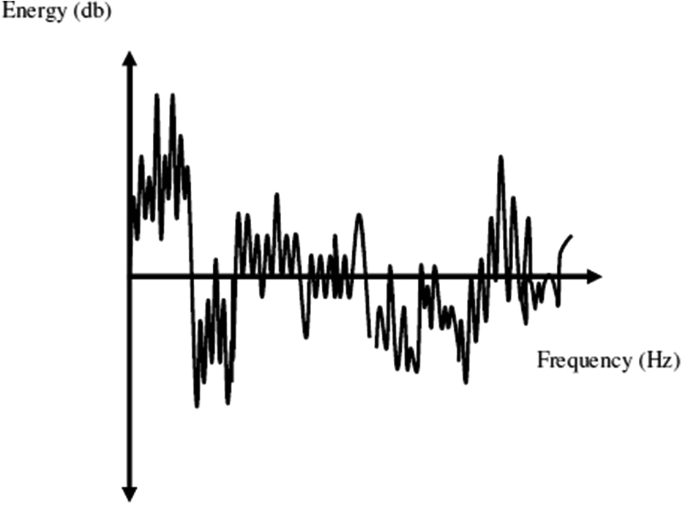
A hiss is a broadband noise that’s more audible at high frequencies but spans the whole audible spectrum. In technical terms, it’s referred to as self-noise or inherent noise and is measured in decibels (dB). You might be familiar with blue noise; a hiss has a similar noise in the audio. It is difficult to avoid because electronic components themselves produce the hissing sound.
You can also produce a hissing sound when you elongate Sss. A hiss is like air getting out of a narrow passage. If you’re a National Geographic fan, you might be familiar with the sound a snake makes in distress. That’s probably the best description of the hissing sound.
Why is There a Hiss in Your Recorded Audio?
You can minimize the hissing sound in your filmmaking but deleting it is impossible. That’s because all electronic circuits produce noise, no matter how efficient. It’s an inevitable consequence of heat generation through the movements of electrons. However, the noise is reduced to its minimum level when using high-quality equipment.
This also means you have to invest in expensive sound gear for videography—the better the microphones, the better the noise control. Unfortunately, even the best video cameras fail to provide you with the best microphones. Thus, you have to add a quality microphone to improve your sound recording. So, when you’re looking for the culprit, you might want to start with the cheapest mic you’re using.
Removing a Hiss Using Editing Tools
You need tools to do the basic audio edits when you’re done with your videography. However, most of these tools have general functions and may not remove the hiss. You need to do an extensive audio cleanup.
Some popular software to remove unwanted background noise and hissing sounds include Adobe Premiere. You can use its noise reduction controls from tools to adjust the settings. Final Cut Pro is another option to remove background hissing noise. It also has built-in noise reduction controls to minimize the disturbance.

Also, the iMovie app is a cheaper option than the above tools. The noise reduction tool of the iMovie app is in the equalizer settings, which allows you to adjust the background noise to the optimum level.
If your audio has too much noise and there’s no easy way out, you should contact the experts at Media Medic for complete audio restoration. Getting professional help saves you much trouble, and you enjoy guaranteed results.
6 Tips to Get Rid of Hiss in Videography
The hissing sound mostly comes from the equipment itself, but some background noises also add to this problem. To help solve these problems at the recording stage, the guidelines below may help. Some of these tips relate to equipment, while others are professional advice to optimize recording. Let’s see what the experts do to get rid of hiss in audio.

1. Optimize the Recording Space
Sometimes you’re recording in your room, but it seems as if you were near a waterfall when you listen to the recording. That’s because many noise-producing items in your room are insignificant in your everyday routine. However, when you record audio, these seemingly innocent noises amplify themselves and become a headache for the listeners.
Thus, when you’re recording, make sure to optimize the space before you start. Tightly close the door and open the windows. You may want to turn off your computer, laptop, or any other gadget that produces even a little bit of sound. Fans are also not allowed. Any other noise source should be identified and eliminated.
2. Reduce Subject-to-Microphone Distance
Once your recording space is controlled, the next step is to set the microphone at an optimum level. Since you have bought the mic, you know better about its abilities. Generally speaking, you should keep your microphone as close to the subject. The speech-to-noise ratio drastically improves when your subject is closer to the mic.
If possible, use a Lavalier microphone. This essentially reduces the subject-to-microphone ratio to the minimum. The effect is incredible. That’s why you see most stage recordings using Lavalier microphones. Similarly, singers also keep the mic close to their mouths during loud stage performances to reduce the hissing sound.
3. Use Microphones with Gain-Boost
Using an enhanced gain microphone preamp is perhaps the best way to reduce hiss and noise from the audio. By doing that, the camera’s preamplifier will not add gain as the volume setting is at low. When you feed it with a signal that contains a lot of gains, it diminishes the dependence of the mic on the camera and provides a different signal to the mic, which is much less noisy.
For that purpose, you should choose a microphone that contains gain adjustments. You can easily attach an external microphone that provides gain before the signal goes to the camera. These mics have special built-in circuits that enhance gain up to 20 dB.
4. Turn Off Auto-Gain on Your Camera
Auto Gain Control or AGC is a helpful feature in modern cameras. Its purpose is to even out sounds when there’s fluctuation in the volume of the subjects. It automatically adjusts the gain for high and low-volume sounds to make them even. However, the drawback is that it enhances everything for quiet settings.
This increases the preamp’s inherent noise level, and you start to hear a hissing or a whoosh sound. Along with that, it also amplifies the surrounding noises and unnecessary sounds in the audio. To avoid getting those unwanted sounds, turn the AGC off. Most new cameras have this option, but you may not find it in every camera. Check out your camera settings to see if this option is available in your model.
5. Reduce the Number of Open Microphones
An open microphone is the one that’s currently recording audio. Decreasing the number of open microphones is also an excellent way to reduce the hissing sound.
You might have noticed that microphones are only opened during a conference even when no one is present. That’s because each open microphone adds a considerable amount of noise. When you double the open microphones in a sitting, the noise increases around 3 dB. For example, if there are eight participants in a discussion, the noise penalty would be 9 dB compared to when only one mic is open. Therefore, you should always work with the minimum number of open microphones during filmmaking.
6. Use Directional Microphones
Microphones ignore signals that fall out of their axis, especially short gun or cardioid polar patterns. They ignore any signal that’s off their ideal pick-up area. You can use this quality of such mics to reduce noise.
In many cases, it’s not possible to eliminate noise from the environment. For that, you can direct the microphone so that the noise source is at the null area (the least sensitive part of the mic) of the microphone. To determine the null angle of any polar pattern microphone, you can consult the manual as the angle shifts for cardioid and super cardioid microphones.
Read More: How to Equalize Audio?
Final Summary
Audio restoration services are readily accessible to solve issues such as hissing sounds on audio files. So feel free to explore your creativity during the recording; even if noisy audio problems arise, rest assured there is a solution.
Often, after investing time and effort in recording, the hiss in the audio threatens to ruin the project. This is due to background noise, either external or internal, to the equipment. When recording, you can eliminate the noise by removing noise sources such as a fan or a computer. You can also reduce the hissing sound by placing the microphone closer to the subject. Another way to eliminate hissing noise is to turn off the auto-gain settings in the camera.
However, if nothing works and the hiss gets on your recording, you should consider using convenient remote audio cleanup services to eliminate the hiss.


