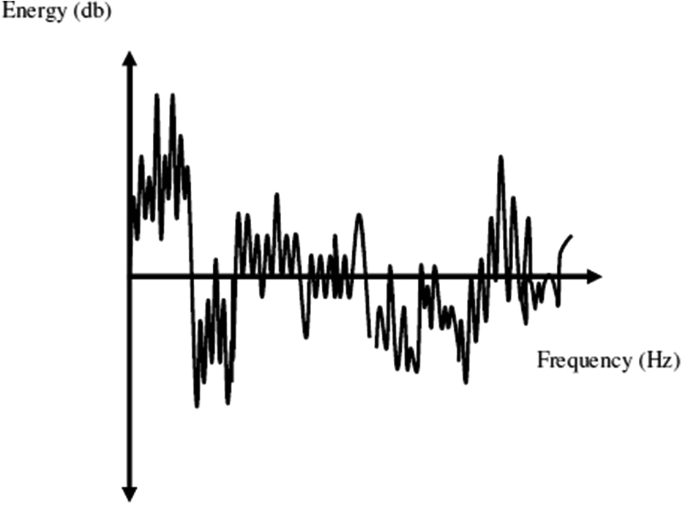
No matter how hard an engineer tries to enhance tracks so that they sound big and clear, sometimes the frequency range is limited. There are different reasons that cause this issue. The tracks may have been recorded in a different studio, where they used different monitors, signal paths, or other differences.
The engineer who mixes the sound needs to extend the frequency range when the track is mixed. The primary tool used for this process is the equalizer, and the quality of the mix is dependent on the skill level of the mixing engineer.
What Does the Equalizer Do?
There are three main goals when inserting an equalizer into a signal path. First, you can make instruments sound more clear and defined. In addition, you can make the mix larger and fuller. Finally, you can adjust the frequencies to give each instrument its own range. Usually, you will be working towards all three goals with any mix.
Understanding Different Frequency Ranges
If you want to look at methods for equalizing, you need to understand the different audio band areas and how that affects what you hear. There are six different ranges, including the following:

- Sub-Bass: The sub-bass is the lowest bass, which falls between 16 and 60 Hz. Often, sounds in the range are felt rather than being heard. They add power to the track, and they should be used sparingly.
- Bass: The bass falls between 60 and 250Hz, and it is made up of the fundamental notes of the rhythm. When you equalize the bass, you can fatten or thin out the balance of the music.
- Low Mids: The low mids fall between 250 and 2000 Hz, and they include the low order of harmonics for most instruments. If you boost it a little bit (between 500 and 1000 Hz), the instruments sound like a horn. If you go higher, it sounds tinny. Too much output can lead to listening fatigue.
- High Mids: When you reach the high mids, above 2 and 4kHz, some speech recognition is masked. This includes sounds such as m, b, and v. If it is boosted too much, it leads to listening fatigue as well, but dipping it helps to make the vocals audible.
- Presence: Thai range is between 4 and 6kHz, and it adds clarity and definition to voices and instruments. If you boost this range, the music appears closer to the listener.
- Brilliance: This range goes from 6 to 16kHz, and it controls the clarity and brilliance of any sounds. You don’t want to place too much emphasis on it because it can lead to sibilance on the vocals.
Methods for EQ
There are general guidelines for equalizer methods, but every song, instrument, and track is unique. There are also different methods that work better for different mixers, and it doesn’t matter which method you use. It only matters that you are able to produce the track you want.

Start by listening and understanding the nuances of sound. You need to make sure that you train your ears to hear everything so that you can pick out distortion and noise. You should also make sure that you monitor at the right level. You don’t want it too loud because some frequencies might be masked. If it is too soft, you could be tricked into thinking that it sounds better than it does.
It takes a great deal of experience to train your ears to hear every sound. Once you do, you can try different ways to equalize the music.
Making the Instrument Sound More Defined
When the frequencies are off, well recorded sounds can lack life. Most of the time, the problem comes from too much lower mids in the 400 to 800 range. You can improve the clarity by setting the boost or cut knob to a moderate level or CUT. You can stay between 8 and 10dB. Then, sweep through the frequencies as you look for the places where the sound has more definition and less boxiness. You can adjust it, but know that you are also thinning the sound.
You can also add a dB or two of upper mid to add point. You can add sparkle by increasing the high frequencies, and you can add air by adding to the brilliance frequencies. Try to cut the frequency first because it doesn’t use as much phase shift, so it is easier to fit the instruments in.
Another option is to start with a flat EQ and remove all of the bottom end. Then tune the mid-upper midrange to make the sound thicker. You can add body with a supporting lower-mid tone, and you can add high frequency for definition.
Making the Mix Larger
The big sound in a mix usually comes from the presence of bass and sub-bass. This exists in the 40 to 250 Hz range. You want to make your sound bigger by adjusting several different frequency regions at the same time, including one below 100Hz and another below it.

You can set the Boost/Cut knob to between 8 and 10dB of Boost. Then sweep through all of the frequencies to find the one where you hear the fullness you desire. You can adjust the boost throughout. If you do too much, the sound will be muddy. You are better off adding a small amount at two frequencies than a large amount at one.
Making the Mix Work by Giving Each Instrument its Own Frequency
For this method, you should start with the rhythm. You want clear bass against the drums, and you should be able to hear each instrument. If you can’t, you need to make sure that none of the equalizers boost at the same frequency. If you have any instrument at a specific frequency, you can boost other instruments at that frequency.
Then you want to add the vocals and follow the same process. Mix them all one at a time. The key is to hear each instrument clearly throughout the mix.
Bass and Drums
The most difficult part for a mixing engineer is balancing the bass and drums. You might spend hours on this. However, it is critical to get it right. Make sure that each has its own frequency.
Final Words
Equalizing audio is a critical part of mixing a track, and it helps to give the sound the fullness that you want. The key is to adjust the frequencies to make the instruments and mix sound more defined, clear, and larger.


