If you have a home studio, you need to know how to use an audio compressor. It will improve all of your music productions. No matter what you are recording, there is a natural range of volume known as the dynamic range. It applies to voice, drums, guitar, and all instruments. The reason you need to know how to use this device is because the volume ranges can be an issue when you mix your track.
An audio compressor allows you to use compression when you are producing music, and it is an essential part of the process. This process prevents certain sounds from standing out, and it allows you to mix the track so that everything blends seamlessly.
Audio Compression Explained
Audio compression reduces the dynamic range of your recording. It lowers the level of the louder parts, which ensures that loud and quiet parts of the track have a more similar volume. The variations in the natural volume will not be as noticeable.
Then, you use the audio compressor unit to boost the level of this compressed audio. This way, your quiet parts are boosted to match the loud parts. This device allows you to have more control over the dynamic volume so that you can increase it within your mix.
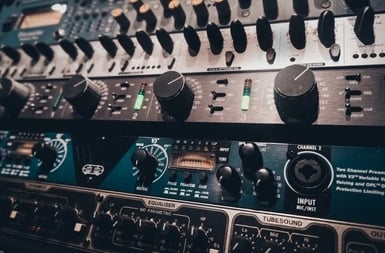
What Are the Compression Controls?
There are many different controls on the compression device, and they all can impact your sound in different ways. Take a look at the following:
- Input Gain: The input gain is the level of signal that goes to the audio compressor. Gain in analog was very straightforward, and it still needs to be considered. The gain control is what you alter before you start other forms of processing, and making an adjustment can change the tone of your audio quite a bit. The gain allows you to alter the sound.
- Threshold: You will set the threshold to tell the compression device which parts of the signal you want to compress. You need to tell it what the loudest parts of the recording are and which part of the signal you want compressed. Once you set it, it tells the compressor when to start changing the dynamics of the recording. If you set the threshold at -20dB, then it will only compress everything louder than -20dB. This allows you to keep certain parts of the audio as is while compressing others.
- Ratio: The ratio controls how much you want the signal compressed once it is over the threshold. When you have a higher ratio, you will have more compression. If you have a ratio of 1:1, there will be no compression. If you have a ratio of 2:1, then for every 2dB of sound that is over the threshold, you will get 1dB of output. In this case, if the signal goes over by 10dB, the compressor will reduce it to 5dB over the threshold. However, if the ratio goes up to 8:1, for every 8dB of sound over the threshold, you will get 1dB of output.
- Attack: The attack is the time that it takes for the compressor to act on the input after the sound level goes above the threshold. It is measured in milliseconds (ms). It is basically the reaction time. With a fast attack speed, the compressor will kick in right away, which helps if you are working to prevent clipping or if you want to tame peaks. It can also make the audio sound more polished. However, if you set the attack too fast, it can make the instruments sound further away. It can also cause distortion or artifacts, especially if you are working with bass. If you use a slow attack speed, the compressor waits for a small amount of the signal to happen before it starts up. This allows you to emphasize a signal, which can make it sound louder and more aggressive. Slow attack speeds don’t work well to control dynamics, and they can actually make uneven dynamics worse.
- Release: The release setting will control the length of time it takes for the compressor to return the signal to an uncompressed state. A fast release speed can increase the perceived loudness of a track, and they sound more natural at low levels of gain reduction. When you have high ratios, however, the tracks might sound more aggressive and can create a pumping sound. If you use a slow release speed, you can smooth the dynamic performance. It can make an instrument sound further away as well. However, if your release speed is too slow, your audio can sound dull or flat.
- Output Gain or Make-up Gain: When you perceive a compressed signal, it appears louder, even though compression lowers the output. Once you compress an audio signal, its level of signal is reduced. However, if you increase the output gain, it raises the level that is coming out of the compressor. This makes it much easier to match the volume to the levels of the rest of the tracks.
- Knee: The knee is the way that the compressor makes transitions between uncompressed and compressed states of signals. Normally, you can choose between a soft knee or a hard knee setting, and the compressor will allow you to control it. The soft knee produces a gentler sound, as the change is smoother. Hard knee compression is louder and more obvious. The knee setting works great for fine tuning your audio signals.
Final Words
You want to have an audio compressor in your studio if you plan to do any audio production. It is important that you learn how to use it, which can be difficult when you are starting out. The effects of your compression aren’t always easy to hear, and it does take some experience. If you want help from a professional while you are learning, you can get it done. This way you can listen to the different tracks and start to learn how to identify the differences.